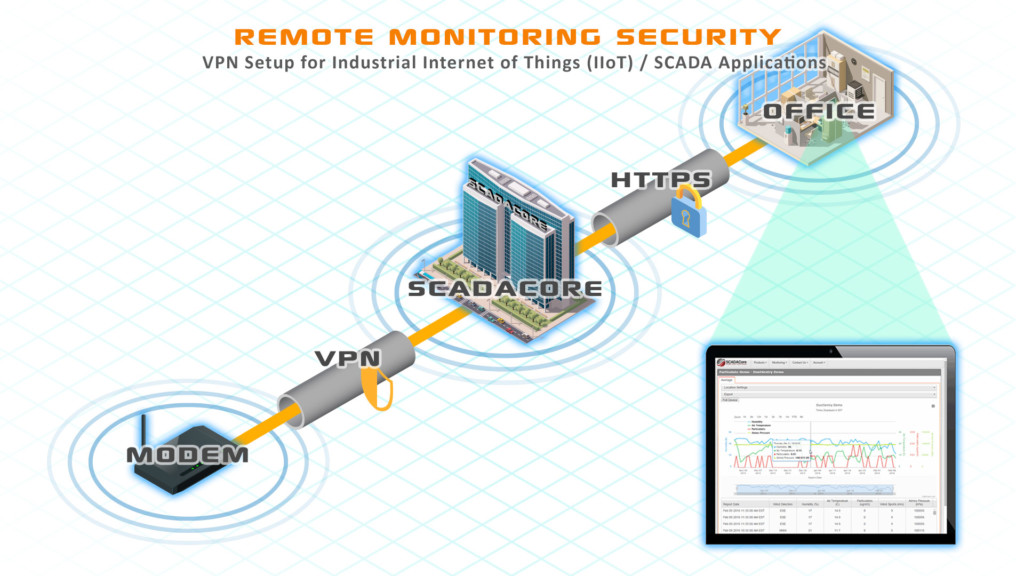
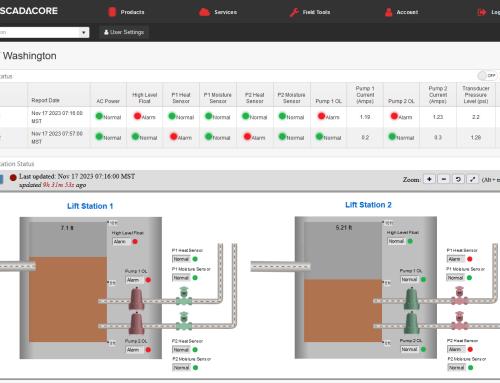
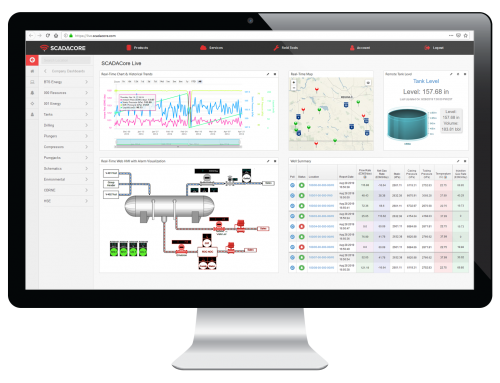
It is always preferable to lock down a modem for IoT through more secure means (See: Cell Modem Security: 7 Ways to Secure Modems for Industrial Internet of Things (IIoT)), but there are special circumstances where some of the methods are not an option: such as multiple parties needing access to the same modem.
To allow for multiple parties to access the same modem, you can set up the modem in one of the following ways:
1. Leave the Modem Open to the Public
Leaveing the modem completely open to the public is the least preferable method. If this is what is chosen, make sure you at the very least do the following:
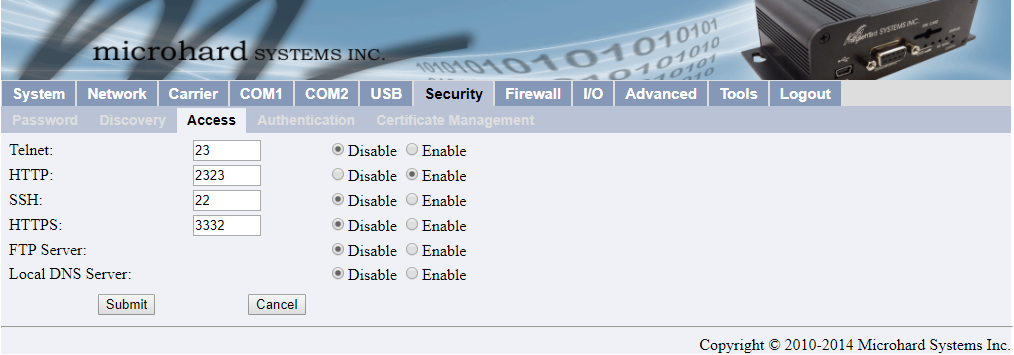
Under Security -> Access, disable all unneeded services such as Telnet, SSH, HTTPS, FTP, Local DNS.
DO NOT disable the HTTP port (it is the only way to access the admin tools), but you can change the HTTP port to non-standard port so it will be more difficult for hackers to sniff the open ports.
Change the HTTPS port as well, even though we disable it here, it is still accessible, so we change it to a non-standard port.
3. Create a Whitelist
Creating a whitelist is a relatively secure method of locking down the modem. Only users with a specific IP range will be able to access the modems. This will only work if you have a static IP range OR that you are confident your dynamic IP will stay within a range.
To create an IP Whitelist on a Microhard modem, go to Firewall -> General, and make sure that the WAN Request is set to BLOCK.
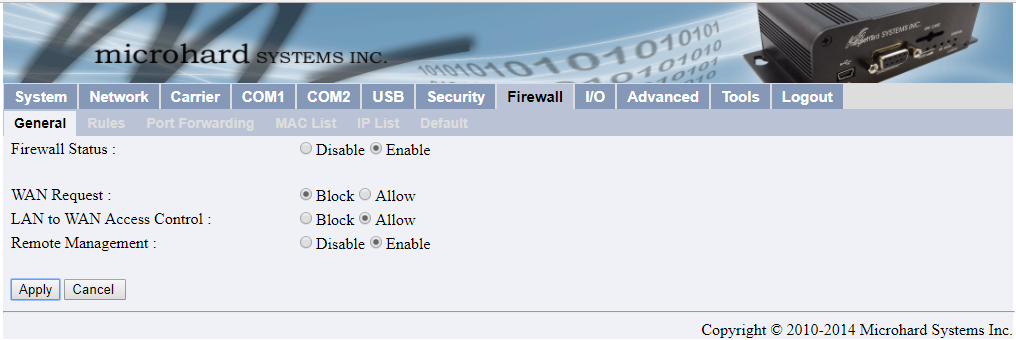
IPn3G modems are slightly different, you must enter the source address and in the destination 0.0.0.0/0.
If you want the Serial Port to be accessible choose Select Zone: none.
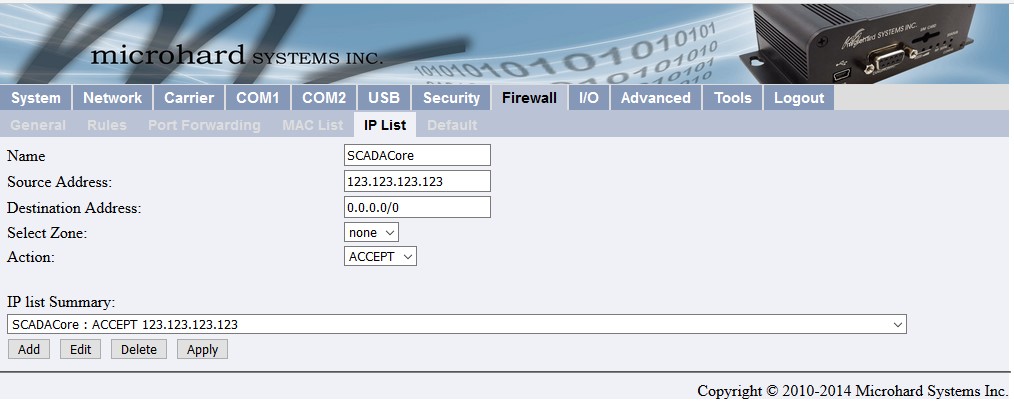
Before you do anything, keep in mind that if you input an incorrect setting, your remote access will be lost. Always have the modem with you so you can connect locally if needed.
The first thing you need to do is find out what your endpoint IP address is. This is NOT your internal IP address (which usually starts with 192.168.x.x). This is the external IP address that you or your sever will be using.
You can use the webpage www.whatismyip.com, it will display your external IP address.
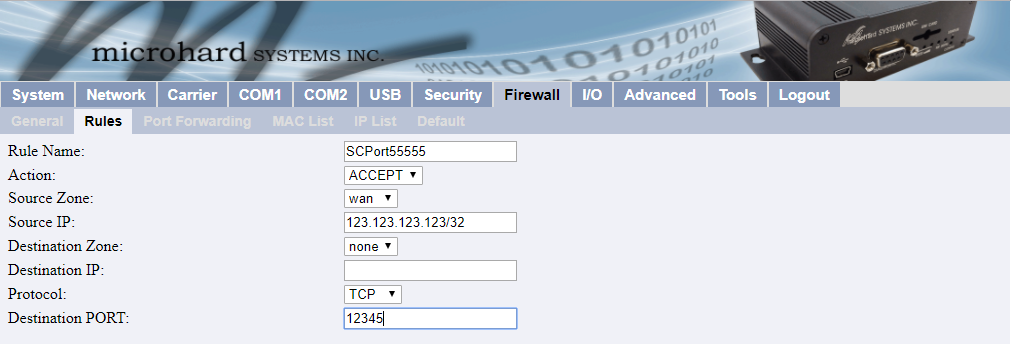
Next, go to Firewall -> Rules
- Enter a Rule Name (SCPort12345) for SCADACore Allow Port 12345
- Under Action, choose Accept
- Source Zone – wan – Also called Cellular
- Source IP – Enter the external IP address and Subnet mask. In this case I want to use everything from my external IP address down to the exact IP. So I use /32 at the end.
- If I wanted to add a range of acceptable IP addresses I would use /24 and it would allow 123.123.123.xxx to access the serial port
- Destination Zone – none – Because I want to access the serial port not the lan or the wan
- Destination IP
- Set Destination IP to BLACK as it is not used when allowing remote users into serial devices “allow everything locally”
- Destination port: is the port of the modem that I will be using: 12345 (was previously set up as a serial port)
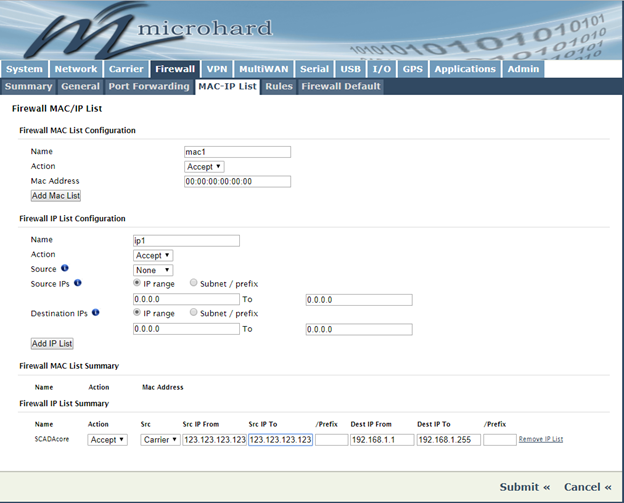
Another method for white-listing an entire IP address can be done under the MAC-IP List menu.
This is a good method to use if you have several port forwards that you don’t want to add individually to the Rules menu.
Test your settings using a tool such as Hercules. You can test to make sure the port is open only for the server or computer with the external IP address specified.
3a. Testing the Whitelist
With Hercules, you can try connecting with an IP address that is not entered in the Microhard modem. For example, if we try to connect to the modem (222.122.122.1) if our external IP is 123.123.124.123, we get:

Conversely, connecting with an IP address that is entered into the Microhard modem (123.123.123.123 for the setup above) shows that the connection is allowed:

Results
With a whitelist, your modem port 12345 (serial port) that is connected to your SCADA device is now locked down, so only your server (or other servers you add) can access it.
You can continue the steps above for the Admin web page as well if you choose.

